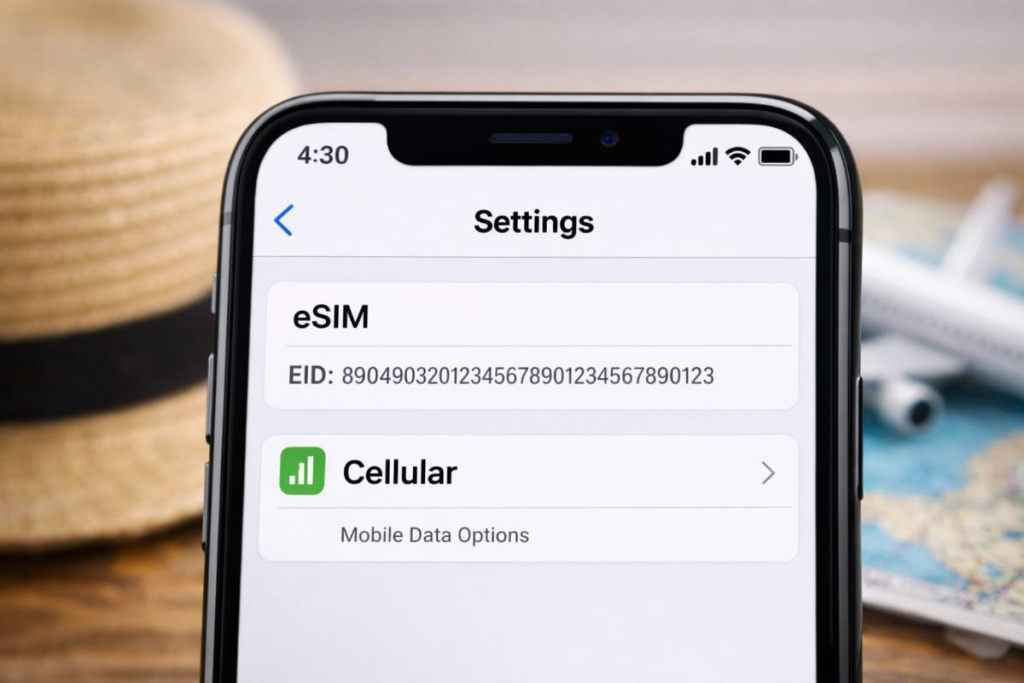
Installing a travel eSIM on an iPhone is one of the most convenient ways to stay connected while traveling internationally, and this guide walks you through every step using iOS 27. If you are planning a trip and want reliable mobile data the moment you land, a travel eSIM iPhone setup can eliminate the need to hunt for local SIM cards or pay expensive roaming charges. The exact activation method depends on your eSIM provider, but QR code installation is one of the most common and straightforward approaches. For travelers who want instant connectivity upon landing, SimMates offers travel eSIMs with coverage in over 180 countries and 5G connectivity. Before you begin, it helps to understand the broader landscape of choosing a travel eSIM so you can pick the right plan for your destination.
Before you begin, it helps to understand what you are working with. An eSIM is a digital SIM built into your iPhone that can store multiple cellular plans and switch between them without any physical hardware changes. A travel eSIM is specifically designed for use in one or more international destinations, offering data connectivity abroad without the hassle of swapping physical cards. With iOS 27, Apple has refined the eSIM setup experience, making QR code scanning and activation more intuitive than ever. Whether you are a first-time eSIM user or upgrading from an older iOS version, this iPhone eSIM setup guide covers everything you need to know to get connected quickly and confidently.
What Is a Travel eSIM?
An eSIM (embedded SIM) is a digital SIM that is built directly into your iPhone. Unlike a physical SIM card that you insert into a tray, an eSIM is programmed remotely and can be activated through your device settings. This means you can add cellular plans without visiting a store or waiting for a card to arrive in the mail.
A travel eSIM is a specific type of digital plan designed for use in one or more international destinations. It differs from a regular local SIM because it is typically purchased online before your trip and activated when you arrive. Travel eSIMs are popular among international travelers because they offer a convenient alternative to roaming or buying a physical SIM at your destination.
It is important to understand that plan features vary. Not every travel eSIM provides calls, SMS, and data. Many are data-only plans, which means you use them for internet access while keeping your primary number active for calls and messages through your home carrier. Always check the specific details of your chosen plan before purchasing. For destination-specific options, you can explore Japan eSIM plans or other regional offerings on the SimMates website.
Does Your iPhone Support eSIM?
Apple supports eSIM on compatible iPhone models, but availability can vary based on your iPhone model, country or region, carrier, and device configuration. Supported models generally include iPhone XS, iPhone XS Max, iPhone XR, and later models, though there are regional and device-specific limitations to be aware of.
In mainland China, for example, only iPhone 18 Pro, iPhone 18 Pro Max, iPhone 17e, and iPhone Air support eSIM, and in Hong Kong and Macao, some models use Dual SIM with two nano-SIM cards instead. To be certain your device is compatible, check your iPhone model and verify with your carrier or Apple’s official documentation.
How to Check Your iPhone Model
- Open Settings on your iPhone.
- Tap General.
- Tap About.
- Look for Model Name to see your specific iPhone model.
Once you know your model, you can confirm eSIM compatibility against Apple’s current list of supported devices.
What You Need Before Installing a Travel eSIM
Before you begin the installation process, gather everything you need. Having these items ready will make the setup smoother and help you avoid interruptions.
- Compatible iPhone (iPhone XS or later, subject to regional availability)
- iOS 27 or the current supported software version
- Travel eSIM plan that you have already purchased
- QR code or another activation method provided by your eSIM provider
- Internet connection, preferably Wi-Fi, for downloading the eSIM profile
- eSIM activation details from your provider (check your email or account)
- Unlocked device where required by your carrier
- Enough battery (at least 30% is a good rule of thumb)
- Access to your email, app, or account containing the eSIM information
Requirements can vary by provider. Not every eSIM uses a QR code for activation, so check your provider’s instructions carefully.
How to Install eSIM on iPhone Using a QR Code
QR code installation is one of the most common methods for setting up a travel eSIM. The steps below reflect the iOS 27 interface and Apple’s current documented process.
Step 1: Connect Your iPhone to Wi-Fi
A stable internet connection is needed to download the eSIM profile. Connect to Wi-Fi before you begin.
Step 2: Open Settings
On your iPhone, open the Settings app.
Step 3: Go to Cellular Settings
Tap Cellular (or Mobile Service, depending on your region).
Step 4: Choose Add eSIM
Tap Add eSIM.
Step 5: Select the QR Code Option
Tap Use QR Code.
Step 6: Scan the QR Code
Point your iPhone camera at the QR code provided by your eSIM provider. If the QR code is on another device, make sure the screen brightness is high and the code is fully visible. If the QR code is displayed on the same iPhone you are setting up, you can press and hold the QR code in your email or browser and tap Add eSIM.
Step 7: Follow the On-Screen Instructions
Your iPhone will detect the cellular plan. Tap Continue when prompted, then tap Add Cellular Plan. If your provider gave you a confirmation code, enter it now.
Step 8: Label the eSIM
iOS lets you name your new plan so you can tell it apart from your primary line. Choose or create a label such as Travel, SimMates, Primary, or Business.
Step 9: Complete Activation
Wait for activation to complete. Activation time can vary depending on your provider and network conditions. Do not close the settings screen until the process finishes.
How to Install a Travel eSIM Directly From iPhone Settings
In some cases, you may be able to install an eSIM without a QR code. The available options depend on your provider and device.
- Open Settings.
- Tap Cellular.
- Tap Add eSIM.
- Choose from the options that appear. These may include Use QR Code, Transfer from Nearby iPhone, or other provider-specific choices.
Do not assume every user sees identical options. The exact menu items depend on your carrier’s eSIM support and your device configuration.
How to Activate a Travel eSIM on iPhone
Installing and activating are two different steps. Installing downloads the eSIM profile to your device. Activating enables the cellular plan and connects it to the network.
An eSIM can be installed but still require correct settings or a network connection before mobile data works. After installation, you typically need to:
- Make sure the eSIM line is turned on
- Select the eSIM as your cellular data line
- Enable data roaming if your provider requires it for international use
For many travel eSIMs, the plan activates automatically when it connects to a supported network in your destination country. Check your provider’s instructions for specific activation behavior.
How to Set Your Travel eSIM as the Data Line
Once your eSIM is installed, you need to tell iOS to use it for mobile data. This is important because otherwise your iPhone may default to your primary SIM, potentially leading to roaming charges.
- Open Settings.
- Tap Cellular.
- Tap Cellular Data.
- Select your travel eSIM from the list of lines.
- Make sure Allow Cellular Data Switching is turned off to prevent your iPhone from automatically switching to your primary line for data.
Dual SIM functionality allows you to keep your primary number active for calls and texts while using the travel eSIM for data. This is a common configuration for international travelers.
How to Keep Your Primary SIM Active While Using a Travel eSIM
One of the advantages of eSIM technology is that you can use two lines at the same time. This is called Dual SIM.
A typical travel setup looks like this:
- Primary SIM: Keep enabled for calls and texts on your regular number
- Travel eSIM: Use for mobile data while abroad
The best configuration depends on your carrier, your travel eSIM plan, and whether you need your primary number active while traveling. If you want to avoid any possibility of roaming charges on your primary line, you can turn off data roaming for that line or disable it entirely.
How to Avoid Roaming Charges While Traveling
Installing an eSIM does not automatically prevent roaming charges. You must configure your cellular settings correctly to avoid unexpected fees.
- Select the travel eSIM for cellular data. This is the most important step. If your primary SIM is selected for data, you may incur roaming charges.
- Review data roaming settings. Some travel eSIMs require data roaming to be turned on to work abroad. Check your provider’s instructions. For your primary SIM, turn data roaming off if you do not want to use it for data.
- Understand your primary SIM’s roaming policy. Contact your carrier or check your plan details to know what happens if your primary line connects to a foreign network.
- Turn off Allow Cellular Data Switching. This prevents your iPhone from automatically using your primary line for data when the travel eSIM has a weak signal.
Taking these steps helps ensure you use the travel eSIM for data and avoid charges on your primary line. For travelers heading to specific events or destinations, you can browse travel eSIM plans tailored to your needs.
How to Activate SimMates eSIM on iPhone
SimMates provides travel eSIMs with coverage in over 180 countries and 5G connectivity. The service is designed for travelers who want instant connectivity upon landing.
Based on the current SimMates offering, the general workflow is:
- Select your destination on the SimMates website.
- Choose a data plan that fits your needs.
- Complete your purchase.
- Receive your eSIM details, which typically include a QR code.
- Install the eSIM on your iPhone using the steps above.
- Activate and use the plan when you arrive at your destination.
SimMates plans include features such as instant eSIM installation, affordable data packages with transparent pricing, and real-time data consumption reports.
When Should You Install Your Travel eSIM?
Timing matters when installing a travel eSIM. Here is what to consider:
- Installing before departure: You can install the eSIM at home over Wi-Fi before you travel. This is convenient and ensures you have everything ready.
- Activating before departure: Some plans may begin their validity period upon installation or when they first connect to a network. Check your specific plan’s activation and validity terms.
- Turning on the plan after arrival: Many travel eSIMs only activate when they connect to a supported network in your destination country. This means you can install early without consuming your plan days.
Do not assume a universal rule. Travel eSIM validity policies differ between providers and even between plans from the same provider. Always verify the specific terms of your SimMates plan before installing too early.
How to Check If Your Travel eSIM Is Working
If you have installed and activated your eSIM but are not getting internet access, work through this checklist:
- Confirm the eSIM line is turned on in Settings.
- Confirm the eSIM is selected for cellular data.
- Check the network signal strength.
- Check data roaming settings if your travel eSIM requires it.
- Turn Airplane Mode on and off to refresh the connection.
- Restart your iPhone if appropriate.
- Check whether your destination is supported by your plan.
- Confirm the plan has remaining data and validity.
- Contact SimMates support if the plan still does not connect.
Do not change APN settings unless your provider specifically instructs you to and provides the correct values. Incorrect APN settings can prevent your eSIM from working.
eSIM QR Code Not Working on iPhone? Try These Fixes
QR code scanning issues are common. If your iPhone will not scan the QR code, try these troubleshooting steps:
- Increase screen brightness. If the QR code is on another device, make sure the screen is bright and clear.
- Make sure the QR code is fully visible. Do not cover any part of it with your fingers or the phone case.
- Clean the camera lens. A smudge can prevent scanning.
- Use the correct iPhone option. Always scan through Settings > Cellular > Add eSIM > Use QR Code, not the camera app alone.
- Try the QR code from another screen or device. If it is displayed on the same iPhone, use the long-press method or display it on a computer.
- Use manual activation details if supported. Your provider may offer an SM-DP+ address and activation code for manual entry.
- Contact your eSIM provider. If the QR code has already been used or is invalid, you will need a new one.
Do not assume a QR code can be reused. Many QR codes are valid for a single scan only. If you have already scanned it, contact your provider.
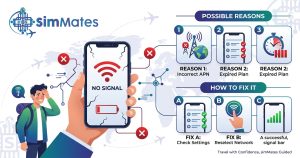
Travel eSIM Installed but No Internet.
If your eSIM is installed but you cannot access the internet, the cause is often a configuration issue. Common reasons include:
- The eSIM is not selected for cellular data
- Data roaming is disabled when your provider requires it
- Your destination is not supported by the plan
- A network selection issue
- The plan has not activated yet
- The plan has expired
- No data remains on the plan
- Your device is carrier locked
- An incorrect configuration
- A temporary network outage
Work through the checklist above in order. Start with the simplest fixes, such as toggling Airplane Mode and confirming the data line selection, before moving to more involved troubleshooting.
What If the eSIM Says “Activating”?
If your iPhone displays an “Activating” message, this is normal. Activation can take time depending on your provider and network conditions.
- Keep your phone connected to Wi-Fi or a stable network.
- Confirm the correct line is enabled in Settings.
- Check that you are in an area with network coverage.
- Restart your iPhone if activation seems stuck.
- Review your provider’s specific activation instructions.
- Contact support if activation does not complete after a reasonable wait.
Do not delete the eSIM while it is activating, as this may cause issues.
Travel eSIM vs Physical SIM
| Feature | Travel eSIM | Physical SIM |
| Installation | Digital, via QR code or settings | Requires inserting a card |
| Physical card required | No | Yes |
| Convenience | High, can be done before travel | Requires visiting a store or waiting for delivery |
| Switching plans | Easy, within Settings | Requires swapping cards |
| Multiple plans | Yes, store multiple eSIMs | Limited by number of SIM slots |
| Travel use | Designed for international travel | Often requires local purchase |
| Risk of losing SIM | Low, stored on device | Higher, physical card can be lost |
| Device compatibility | iPhone XS and later (subject to region) | Broader compatibility |
| Activation | Digital, often instant | Depends on provider |
Travel eSIM vs International Roaming
Travel eSIMs and international roaming are different approaches to staying connected abroad.
| Feature | Travel eSIM | International Roaming |
| Service type | Separate cellular plan | Uses your existing carrier through partner networks |
| Billing | Prepaid, transparent pricing | Varies by carrier, sometimes expensive |
| Setup | Install eSIM before travel | Usually automatic when you arrive |
| Coverage | Depends on provider and plan | Depends on carrier agreements |
| Speeds | Varies by network | Varies by network |
| Cost control | Prepaid, easier to predict | Can be unpredictable |
A travel eSIM can be a cost-effective alternative depending on your destination and plan, but it is not always cheaper. Compare options based on your specific needs.
Why Use SimMates for Travel eSIM?
SimMates offers travel eSIMs with coverage in over 180 countries and 5G connectivity where available. The service is designed for travelers who want to get online quickly without visiting SIM booths or paying high roaming fees.
Key features include:
- Coverage in 180+ countries
- 5G connectivity on supported networks
- Instant eSIM installation
- Affordable data packages with transparent pricing
- Real-time data consumption reports
- Customizable packages to fit your travel needs
- Fast and reliable support
Image 2: Scanning an eSIM QR Code
Visual concept: Close-up of an iPhone camera scanning a QR code on a computer screen.
esim-qr-code-iphone-setup.jpg
Alt text: Scanning an eSIM QR code on iPhone
Frequently Asked Questions About iPhone Travel eSIM
1. How do I install a travel eSIM on an iPhone?
Go to Settings > Cellular > Add eSIM, then select Use QR Code. Scan the QR code provided by your eSIM provider and follow the on-screen instructions. You can also install via a provider app or manual activation details in some cases.
2. How do I activate an eSIM using a QR code on an iPhone?
Open Settings, tap Cellular, then Add eSIM. Choose Use QR Code and scan the code with your iPhone camera. Tap Continue when the plan is detected, then complete the setup by labeling the line and confirming activation.
3. Where is Add eSIM on iPhone?
Add eSIM is found in Settings > Cellular (or Mobile Service in some regions). If you do not see it, your device may not support eSIM or your carrier may not offer eSIM activation through this menu.
4. Can I install a travel eSIM before my trip?
Yes, you can install a travel eSIM before you travel. However, check your plan’s activation policy. Some plans only start their validity period when they connect to a network in your destination country, while others activate on installation.
5. Can I use my physical SIM and travel eSIM together?
Yes. Dual SIM allows you to use your primary SIM for calls and texts while using the travel eSIM for mobile data. This is a common setup for international travelers who want to keep their regular number active.
6. Why is my travel eSIM not working?
Common causes include the eSIM not being selected for cellular data, data roaming being disabled, the plan not being activated, or a network coverage issue. Check your data line selection and roaming settings first.
7. Do I need Wi-Fi to install an eSIM?
Yes, you generally need an internet connection to download the eSIM profile. Wi-Fi is recommended because it is stable and does not use your mobile data. Some iPhone models in certain regions can activate without Wi-Fi, but Wi-Fi is the safest option.
8. How do I know if my eSIM is activated?
Check Settings > Cellular. Your eSIM line should show as active with signal bars. If you have selected it for cellular data and can browse the internet, it is activated and working. Data roaming may need to be on.
9. Can I use SimMates eSIM on my iPhone?
Yes, SimMates eSIMs work on compatible iPhones (iPhone XS and later, subject to regional availability). You install the eSIM using a QR code or the methods provided during purchase, then activate it for use in your destination.
10. How do I avoid roaming charges when using a travel eSIM?
Select the travel eSIM as your cellular data line in Settings. Turn off Allow Cellular Data Switching. Check your primary SIM’s roaming settings and disable data roaming for it if you do not want to use it for data abroad.